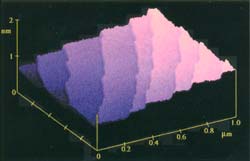
It is known that heating in an ultra-high vacuum can control the aggregate state of steps with atomic-level heights on the silicon surface. For the Si(111) plane, the atomic step height is crystallographically determined to be 0.31 nm.
By using this sample, you can calibrate your atomic force microscope (AFM) in the Å order in the height direction and evaluate the device performance.

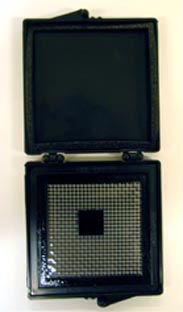
The sample size is 10mm x 10mm and can be used with any AFM instrument. The central part of the sample will be delivered so that it does not come into contact with the package, etc.
You can use it for more than 6 months if you store it carefully against humidity, floating contaminants, etc.
Usage
- Equipment height calibration
- Equipment performance check
Please refer to J.Vac.Sci. & Technol., A14, 1228 (1996) for the height calibration method using the same surface structure as this sample. For the specific calibration method, please contact the place of purchase of the device.

The number of intersections of steps is as small as possible, and SiC particles are produced during heat treatment as little as possible.
AFM (Atomic Force Microscope) Standard sample for height calibration Specifications etc.
| Product name: |
Standard sample for AFM height calibration with atomic step height Item No.: S-AFM-1 |
|---|---|
| Sample: | Silicon (111) substrate |
| Sample size: |
10mm x 10mm x (substrate thickness) If you have a desired sample size, please contact us separately. |
| Effective area: | Central part 6mm×6mm |
| Attachment: | AFM observation result (1 μm × 1 μm) |
| Observation guarantee period: |
6 months after delivery However, store in a desiccator or the like with humidity controlled by dry inert gas or desiccant. In addition, it is recommended to blow off dust attached during measurement by blowing with a dry inert gas (nitrogen, etc.). We cannot guarantee that the surface structure will deteriorate due to the setting of the AFM measurement conditions, or if it will be washed with organic chemicals, water, etc. |
| List price: | 250,000 yen |
| deadline: | 1-2 months |
(Reference) National Institute of Advanced Industrial Science and Technology National Metrology Center


 close up